Date: 26th march 2020
Hello Kids and Parents
Welcome to the art virtual class
- For children who doesn't have the art book yet, the images for the respective activities are attached so they can be printed
- You have to send the evidence through email linahernandez@gcmeryland.edu.co, skype or whatsapp
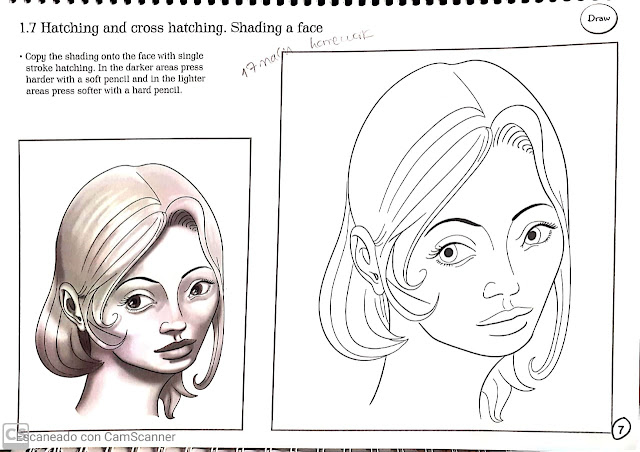
This is the first page we are going to develop (#7)

Also I leave a video for a better understanding, explaining the development of page #7
This is the second page we are going to develop (#8)
Also I leave a video for a better understanding, explaining the development of page #8
This is the third page we are going to develop (#9)
Also I leave a video for a better understanding, explaining the development of page #9
This is the fourth page we are going to develop (#10)
Also I leave a video for a better understanding, explaining the development of page #10
This is the last page we are going to develop (#11) and it will helps you to understand important concepts
Dear parents and children, with this last activity we will close what we learned in the period.
It is a closing activity that not only involves the manual skills learned by the kids, it also involves a reflection that I consider important at the moment: To understand the value that we must give to our environment, being more aware of all the waste we produce.
- It is for you to develop it during your vacation period, you have til 20th april 2020
Face shaped painted plastic Bottle Planters
With these activity we will turn a plastic softener, laundry soap or milk bottle into a beautiful planter for your balcony/garden/house
Materials needed:
- Plastic softener, laundry soap or milk plastic bottle (2L recommended)
- Permanent Markers with different colours
- Scissors or a knife (be careful with this, ask your parents for help)
- Potting soil (when the quarantine ended)
- Plants of your choice
Step 1
To make a nice looking bottle planter you should first clean the bottle.
Step 2
After this you should cut the bottom of the bottle with a knife or big scissors (be careful, ask your dad or mom to help you with this step)
Step 3
When you finished this steps, you can start painting your bottle with the markers. It would be better to use the handle of the bottle as the nose of the face. then you can draw the eyes and the lips with different patterns and motifs.
Step 4
When you finished with the painting part, you can put small amount of rocks or a piece of newspaper into the bottle, which will provide with a nice working drainage
after all those pretty steps you can putsome potting soiland you choosen plants.
Here you got some examples
Hello Kids
Welcome back to your virtual art class
Date: 24th april 2020
This are the first pages we are going to develop (#13-14)
Also I leave 2 videos (english and spanish) for a better understanding, explaining the development of the pages 13-14
English
Spanish
And a youtube video with the postive and negative space concepts explanation
Hello Kids
Welcome back to your virtual art class
Date: 13th May 2020
This is the page we are going to develop (#12)
Also I leave 2 videos (english and spanish) for a better understanding, explaining the development of the page 12
English
Spanish
Hello Kids
Welcome back to your virtual art class
Date: 22th May 2020
You only need:
- Cardboard (recycled, of course)
- Primary colours paint (blue, red, yellow, black and white)
- Scissors
- Glue
- Toilet paper or paper towels
- A bowl to mix the glue and water
- Paint brushes
Here you got the step by step for the development
1)Draw a sketch of the future product
2)Transfer it to the cardboard piece by piece, to later cut them out
3)Now glue the parts together
4) Glue a bow to the back of the cardboard
5) Add a layer of toilet paper or kitchen towel with water glue to the mask (back and front)
7) We paint a base in black
8)Using a dry, hard brush, apply a brown color (mix yellow, blue and red to get the brown color)
9)In the final stage, lightly paint the mask with a beige color scheme. (mix white with a little yellow)
Here you got another example, for a female mask
Hello Kids
Welcome back to your virtual art class
Date: 10th June 2020


